What you can do with XnView MP:
• Add text watermarks to hundreds of photos simultaneously
• Batch convert JPG images to WebP or PNG for web optimization
• Resize and rename multiple files at once
Don’t have XnView MP installed yet?
Discover this versatile viewer supporting over 500 formats.
How to Batch Process Watermarks & Conversions in XnView MP
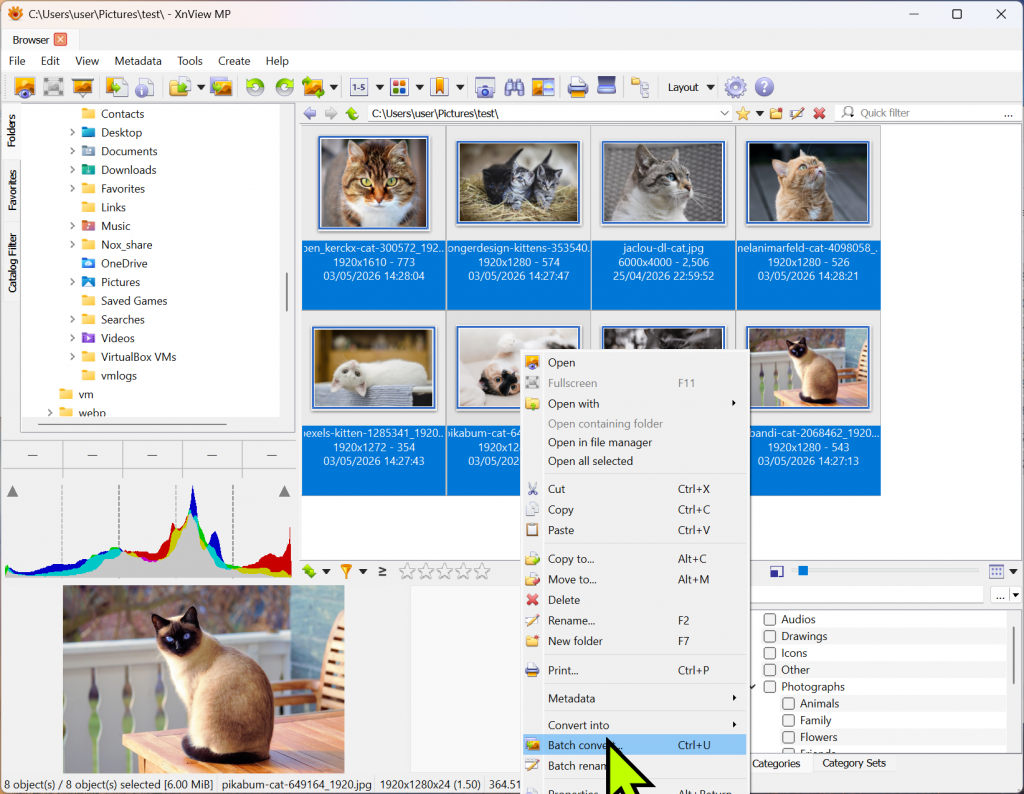
Step 1: Select Images and Run Batch Convert
In the XnView MP browser, select all the photos you want to process. Then, Right-click -> [Batch convert] or press the shortcut Ctrl + U.
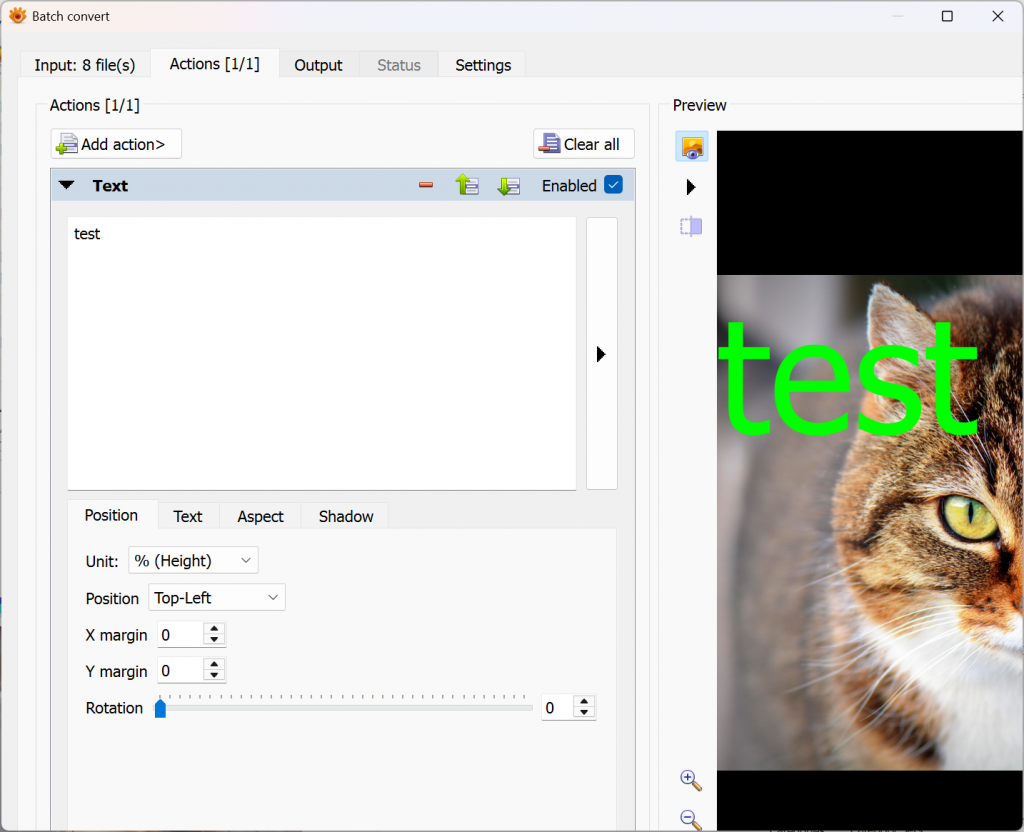
Step 2: Add Text Watermark (Actions Tab)
Go to the [Actions] tab at the top and select [Add action] -> [Image] -> [Text].
- Enter your desired text (e.g., Copyright by…).
- Set the watermark location (e.g., Bottom Right) under Position.
- Adjust font, color, and opacity. You can see the changes in real-time in the preview pane.
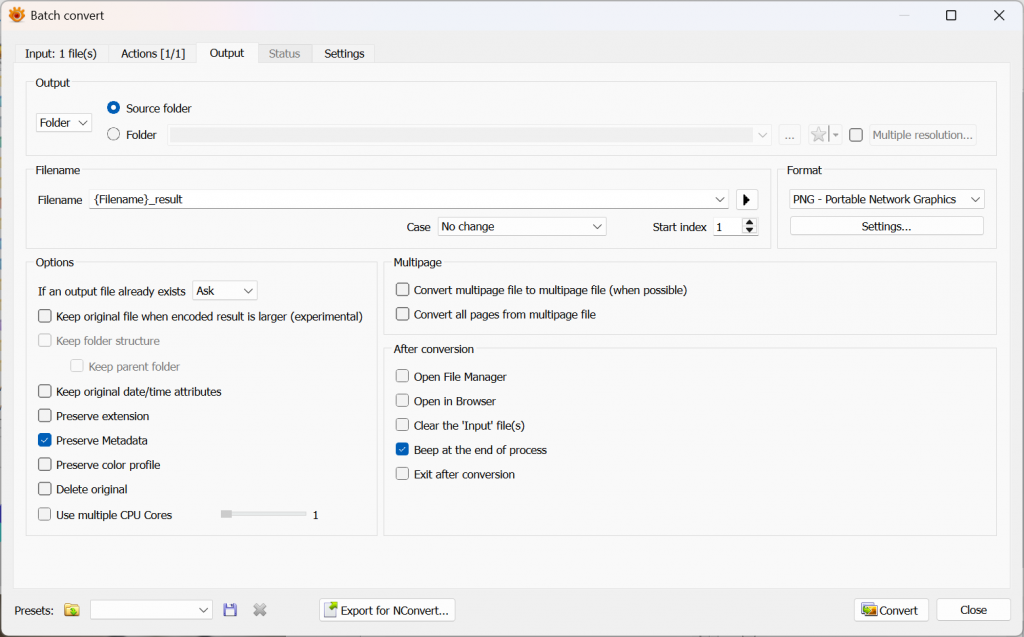
Step 3: Set WebP / PNG Format (Output Tab)
Now, switch to the [Output] tab.
- Format: Select WebP or PNG from the dropdown menu.
- Folder: Choose where to save the files. (We recommend a different folder than the original.)
- Filename: You can add a suffix like ‘_watermarked’ to distinguish them from the originals.
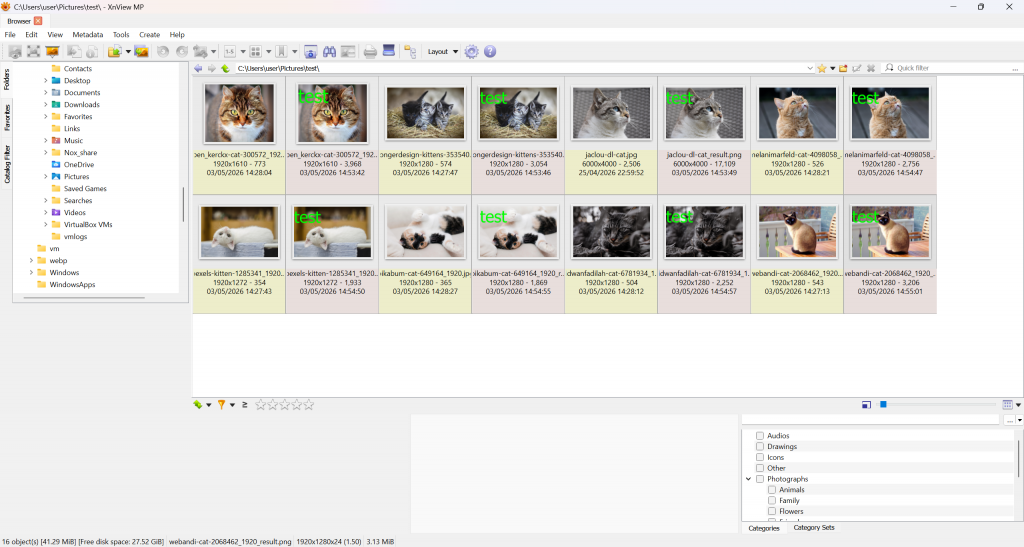
Step 4: Execute Final Conversion
Once everything is set, click the [Convert] button at the bottom right. All images will be watermarked and saved in the new format instantly.
Was this helpful? You can save these settings as a ‘Preset’ in XnView MP to repeat the same watermarking process with just one click next time!