Windows 11 Shared Folder Not Working After Update or Reinstall – 3 Easy Fixes
If your network shared folder connection stopped working in Windows 11 after an update or a reinstall, here’s a solution that worked for me.
When I tested the connection by pinging the shared PC’s IP address, the ping was successful. So, the network line was working fine, but I still couldn’t access the shared folder on that PC.
After many trials, I found that setting up the three fixes below at once resolved the issue. Whether it’s a shared folder on another PC or a NAS, everything connected just like it used to work in Windows 10.
Here are the most common symptoms:
- The shared folder works fine from other PCs, but not from this specific PC.
- Only this PC shows a login prompt when accessing the shared folder.
- The login window appears even though no password was set for the shared folder.
If you apply all three fixes below at the same time, the issue is usually solved in one go.
These settings should be applied on the PC that is trying to access the shared folder.
Do not apply these settings on the main PC that is providing the shared folder.
1. Fix Shared Folder Access on This PC – Use PowerShell Commands

Windows 11 Network Shared Folder – Set-SmbClientConfiguration
You can run PowerShell commands to adjust security settings and allow shared folder access.
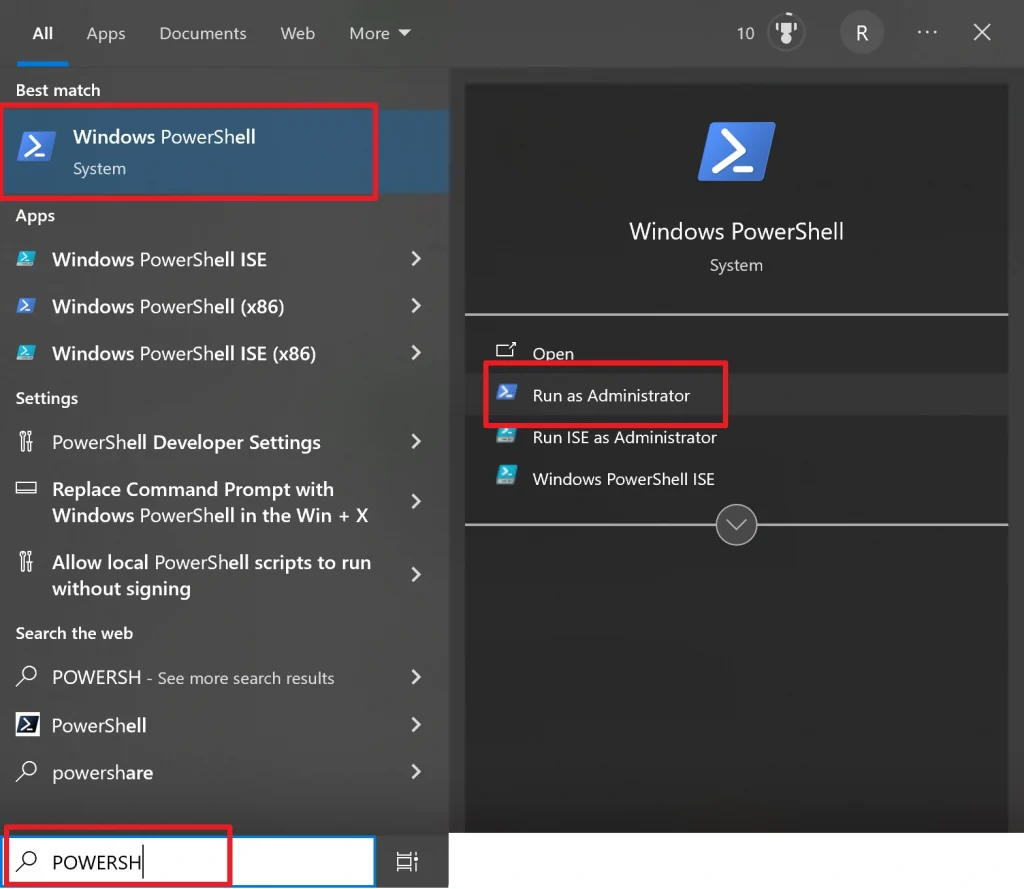
1. Search for PowerShell → Right-click → Run as Administrator
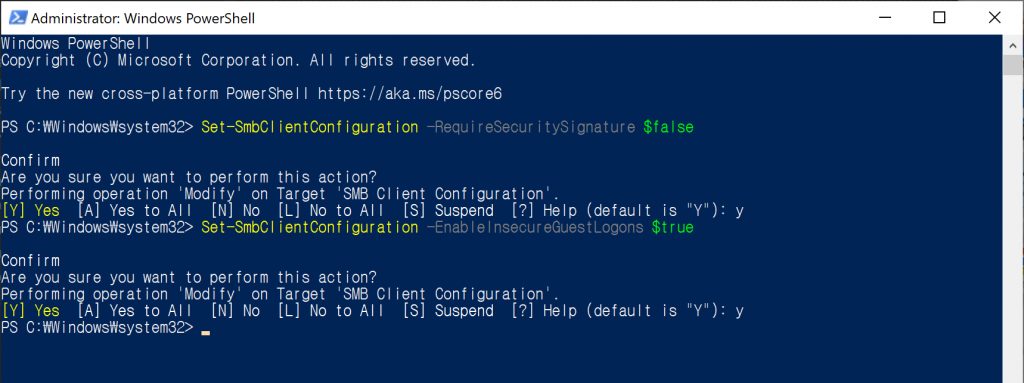
2. Type: Set-SmbClientConfiguration -RequireSecuritySignature $false → Press Enter → Type y → Press Enter
3. Type: Set-SmbClientConfiguration -EnableInsecureGuestLogons $true → Press Enter → Type y → Press Enter
2. Disable SMB Digital Signature Requirement
Starting with Windows 11 24H2, digital signatures are required for all SMB connections.
If digital signing is not configured, you may get blocked when trying to access shared folders on another PC or NAS. This is why only this PC cannot connect.
1. Press Windows Key + R to open the Run window.
2. Type gpedit.msc → Press Enter. (If it doesn’t open, you’re probably using Windows 11 Home version. You can install the Group Policy Editor using the file below.)
👉 Download gpedit.msc Installer
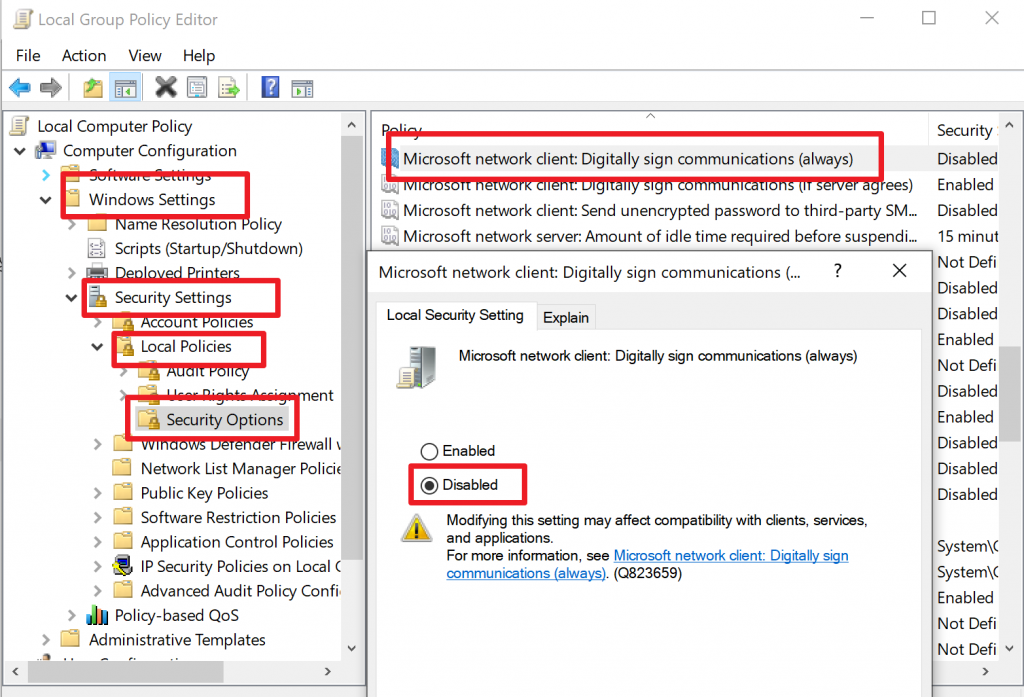
3. Go to: Computer Configuration → Windows Settings → Security Settings → Local Policies → Security Options
4. Double-click on “Microsoft network client: Digitally sign communications (always)”
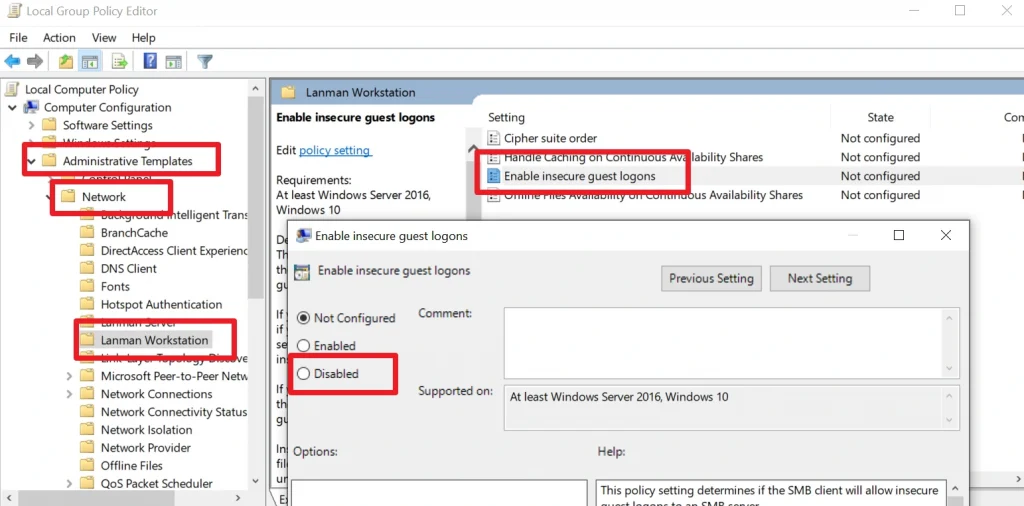
5. Also go to: Computer Configuration → Administrative Templates → Network → Lanman Workstation
6. Double-click “Enable insecure guest logons” → Set to Disabled → Apply → OK
7. Restart your PC if necessary.
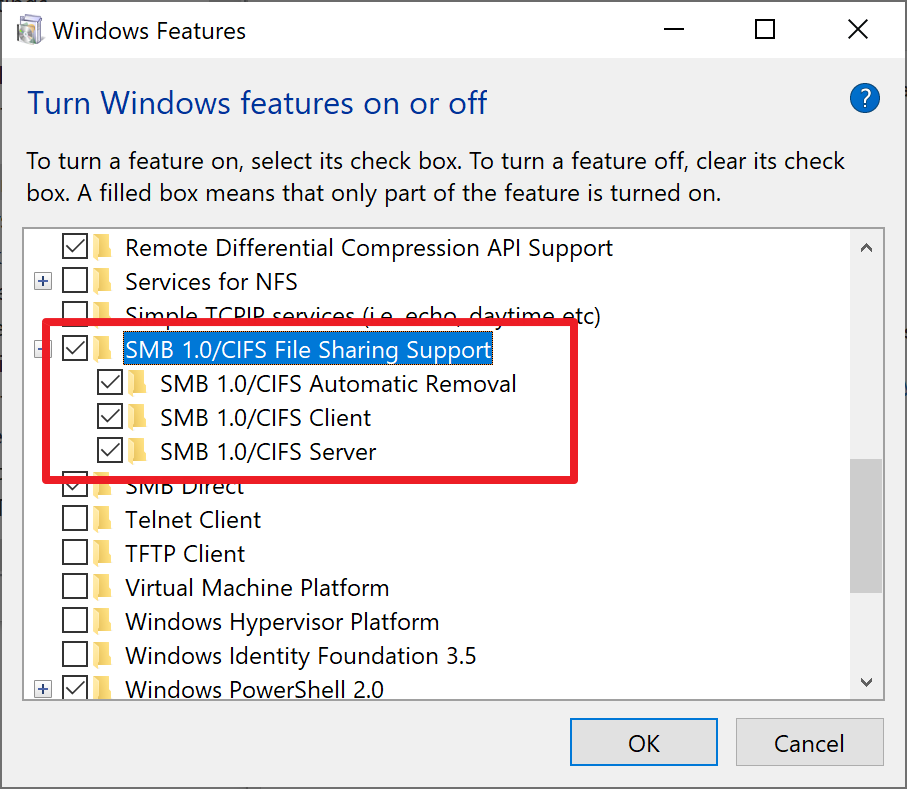
3. Enable SMB 1.0/CIFS File Sharing Support for NAS Connections
Windows 11 disables SMB 1.0 by default for security reasons.
However, some older NAS devices still require SMB 1.0. If this feature is disabled, you won’t be able to connect to them. Enabling it can solve the problem and restore NAS shared folder access.
1. Press Windows Key + R to open the Run window.
2. Type optionalfeatures → Press Enter
3. The “Turn Windows features on or off” window will appear.
4.Check SMB 1.0/CIFS File Sharing Support → Click OK
5.Windows will enable the feature. Restart your PC if prompted.
Conclusion – How to Fix Windows 11 Network Shared Folder Access Problem
Windows 11 network shared folder connection issues have become more common recently.
In many cases, shared folders that worked fine before stop working after Windows updates or reinstalls.
In this post, I’ve shared:
✔️ PowerShell commands to adjust security settings
✔️ How to disable SMB digital signature requirements
✔️ How to enable SMB 1.0/CIFS file sharing support
If you apply all three solutions together, most shared folder access problems can be solved at once.
If your shared folder suddenly stops working, or it used to work in Windows 10 but no longer connects in Windows 11, just follow the steps in this guide and you should be able to access your shared folders again.