After reinstalling Windows, I noticed that the Recycle Bin was not showing in File Explorer on Windows 10.
It’s usually convenient to have it in the left sidebar so you can access or restore files without going back to the desktop.
But after the reinstall, it simply wasn’t visible anymore, which was quite inconvenient.
In fact, many users encounter the same problem: Recycle Bin not showing in File Explorer Windows 10.
By default, Recycle Bin is hidden in File Explorer.
Sometimes, however, you may want to access it directly from the navigation pane and restore files easily.
When it’s missing, it can be frustrating.
Here’s how to make Recycle Bin visible in Windows File Explorer.
In the default state, the left navigation pane in File Explorer does not display the Recycle Bin.
This is because it is hidden in the default settings.
How to Show Recycle Bin in File Explorer
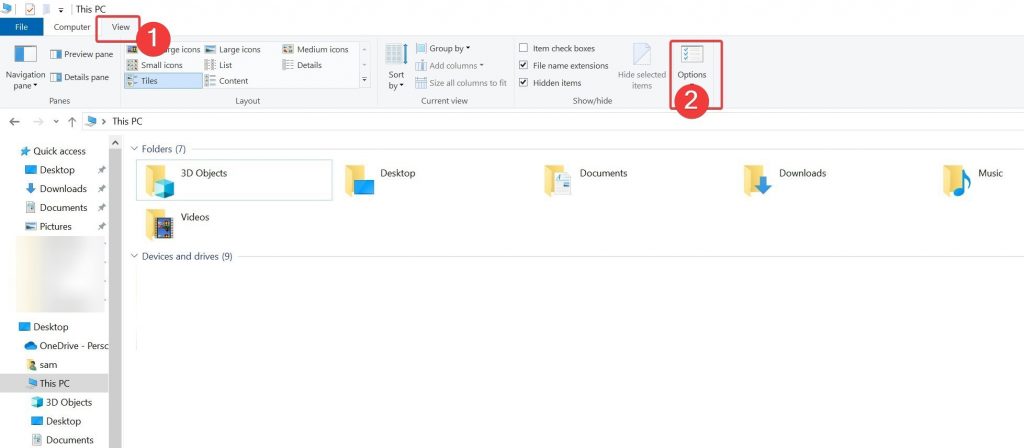
1️⃣ In File Explorer, click on the top menu View.
2️⃣ From the right side, select Options.
3️⃣ In the “Folder Options” window, go to the top tab and click View.
4️⃣ Under “Advanced settings”, find the Navigation pane → Show all folders option and check it.
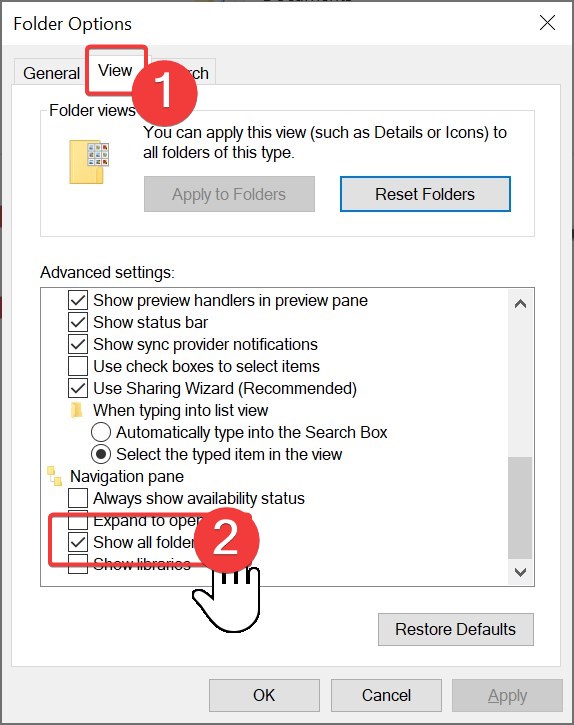
5️⃣ Click OK to save and close the settings.
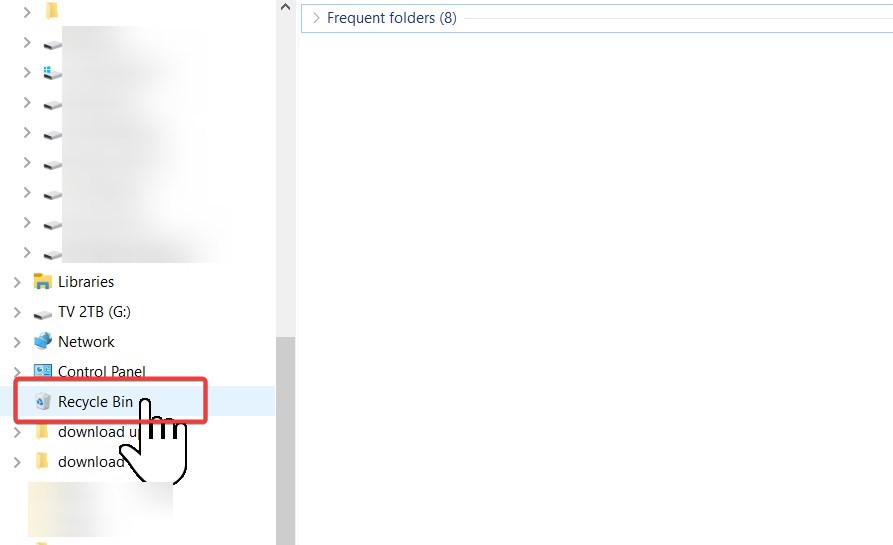
👉 Now, when you reopen File Explorer, you will see Recycle Bin in the left navigation pane.
From now on, Recycle Bin will always be visible whenever you open Explorer.
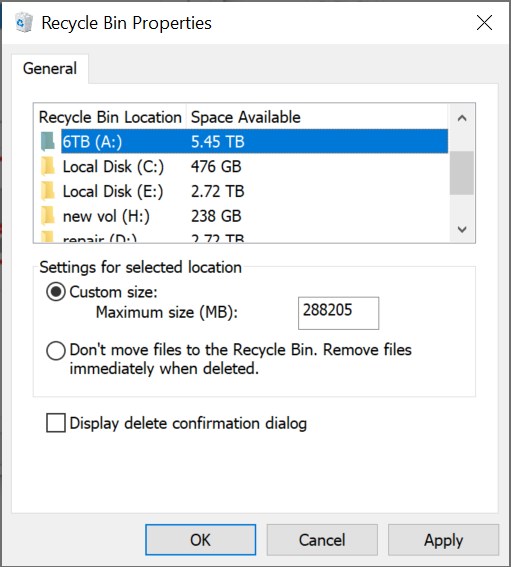
Recycle Bin Properties – Key Settings
Once the Recycle Bin properties window is open, you can review and adjust several useful settings:
- 1️⃣ Select a drive and specify the maximum size that the Recycle Bin can use on that drive.
- 2️⃣ If you check the option “Don’t move files to the Recycle Bin. Remove files immediately when deleted”, files will bypass the Recycle Bin and be permanently deleted.Even if this option is not enabled, you can still permanently delete files anytime by pressing Shift + Delete.
- 3️⃣ You can also enable the option to Display delete confirmation dialog, which prompts you to confirm before a file is deleted.